Ten days in the Western Cape
Ten days is enough to treat Cape Town as a base for the first half of the trip and then loop out into the wider Western Cape for the second — the West Coast at Langebaan, and the Overberg run from Hermanus down to Cape Agulhas and back via Swellendam. It’s a genuine road trip with a hire car doing real work most days, except for the Winelands, which stays a driver-or-tour day throughout regardless of how confident you feel behind the wheel by that point.
| Best for | A hire-car trip long enough to leave the city and cover real ground |
| Pace | Moderate — five Cape Town base days, then a five-day loop further afield |
| Getting around | Hire car throughout, except Winelands days (driver/tour required) |
| Weather risk | Table Mountain cableway — keep it flexible in the first few days |
| Skip if | Ten days feels like too much driving — see seven days |
Days 1–2 — Table Mountain, the city and the peninsula
Check Table Mountain’s cableway status before planning your first morning — it closes for wind or low cloud without much warning, and with ten days ahead there’s no need to force it if conditions aren’t right. Spend Day 1 around the city centre, going up whenever the weather actually cooperates. Day 2 is a full day down the peninsula to Cape Point and Simon’s Town’s penguin colony at Boulders Beach; a full-day Cape Peninsula tour is worth considering even with your own car, since it removes the navigation pressure on a route with several distinct stops. Pack a layer regardless of the city forecast — the peninsula runs noticeably windier.
If the weather is clear on arrival, don’t wait: the Table Mountain cableway guide explains how the queue and the closures work, and Table Mountain itself is the place to start if you’d rather walk up. When the cloud sits low, the tablecloth explainer helps you read the sky and swap days without fuss. The peninsula day is covered in more depth in the Cape Point guide, and the choice between your own wheels and a guided route is weighed in self-drive versus tour. Boulders Beach has its own page too: the penguins at Boulders.
Use the first evening to settle in rather than to sightsee. After a long flight the body clock is rarely on your side, and the first-day jet lag notes are a sensible read before you plan anything ambitious. If you’d like a shorter version of this opening stretch to compare against, the two-day itinerary covers the same core sights at a tighter pace.
Days 3–4 — Stellenbosch, Franschhoek and Paarl
Leave the car behind for Stellenbosch and Franschhoek — South Africa’s drink-driving limit is low and strictly enforced, and a tasting day needs someone else driving between estates. Go with a full-day wine tasting tour covering both towns. On Day 4, add Paarl, the third of the region’s major wine towns; if you’d rather have a driver tailor the day around specific Paarl estates and pacing rather than following a fixed group itinerary, a private, customisable tour is a reasonable upgrade for this particular day. Either way, the same rule applies — no self-driving between tastings, on any of these two days.
The two days work best when each has a clear character. One can lean on the university-town feel of Stellenbosch, with its oak-lined streets and easy wandering between tastings; the other on Franschhoek, which suits a slower, lunch-centred rhythm. If you can’t decide which town deserves more of your time, Stellenbosch versus Franschhoek lays out the differences honestly. The wider picture for first-timers is in the Cape Winelands guide, and Paarl and Wellington is the page to read before you commit Day 4 to that corner. Anyone who would rather not rely on a hire car at all for these days will find options in the Winelands without driving. A little preparation on tasting etiquette and costs also saves awkward moments at the first estate.
Day 5 — Robben Island
Book Robben Island as early as your dates allow — the crossing and guided tour take up a good part of the morning, and it’s cancelled outright in rough seas with little notice. Go with a Robben Island ferry ticket with guided tour. With five more days ahead, a cancellation here is manageable — ask about rebooking before you set off on the second half of the trip, since it’s much harder to arrange once you’re out on the West Coast or Overberg legs.
The visit is more meaningful with some background. The Robben Island guide explains what the tour involves, and the destination page for Robben Island gives the practical setting. Many travellers pair the day with the city’s wider story — apartheid history in Cape Town is a good companion read, and the afternoon back on the mainland leaves room for the District Six Museum if you want to keep going. Keep the rest of the day light: the island tour is emotionally heavy for many visitors, and an easy evening in the city is a better ending than another sight.
Day 6 — Langebaan and the West Coast
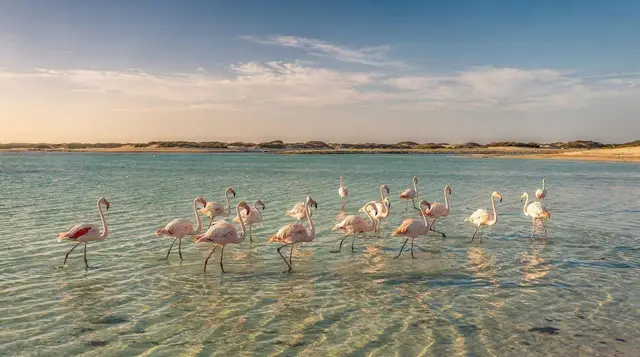
A day trip in the opposite direction from everything so far: Langebaan, on the West Coast, centred on a wide, shallow lagoon known for watersports and a slower, quieter pace than the peninsula or the Winelands. It’s a genuine change of scenery — flatter, more open landscape than the mountains around Cape Town — and a good day to drive yourself, since there’s no tasting circuit to navigate around. Fuel up before you leave; services thin out once you’re clear of the city’s northern edge.
Langebaan sits beside the reserve described in the West Coast National Park guide, which is the natural anchor for the day if you enjoy open landscapes and birdlife. In spring the surrounding countryside can be at its best — see the West Coast wildflowers guide for the season. The Langebaan destination page covers the town itself. Take a picnic mindset: this is a day for unhurried stops rather than a checklist, and it rests the legs after the busier days that came before.
Days 7–8 — Hermanus and Gansbaai
Drive out to Hermanus, the better part of an hour and a half from Cape Town, and base yourself there for two nights. Roughly June to November, southern right whales pass close enough to the cliffs that no boat is needed — a clifftop walk on a good day can turn up several sightings on foot alone. Outside that window, the coastline is still worth the drive; just don’t build the day around a sighting that isn’t likely.
On Day 8, a short drive on to Gansbaai for those who want to get in the water rather than watch from the cliffs — it’s one of the best-known spots in the region for shark cage diving. Go with an eco-friendly Gansbaai shark cage diving cruise if that’s of interest; if not, Gansbaai’s harbour and coastline are worth a slower, non-diving visit too. Sea conditions can cancel diving trips at short notice, much like Robben Island — if that happens, an extra clifftop walk back at Hermanus is a straightforward substitute for the day.
For the whales, the whale watching in Hermanus guide and the season guide will help you judge your timing, and the Hermanus destination page covers the town. The diving side is explained in the Gansbaai shark cage diving guide, worth reading before you decide whether it suits you. If you’re travelling in the whale months and want a fuller plan around them, the whale-season itinerary is a useful comparison.
Days 9–10 — Cape Agulhas, Swellendam and the return
Cape Agulhas, not Cape Point, is Africa’s true southernmost tip, and the point where the Atlantic and Indian Oceans are officially said to meet — it’s a longer drive again, roughly two and a half hours from Cape Town and a couple of hours on from Hermanus, so treat Day 9 as a driving day with a rewarding payoff rather than a quick stop. From there, continue to Swellendam, one of South Africa’s oldest towns, with a cluster of well-preserved Cape Dutch architecture around its historic centre — a good overnight stop before the final leg back.
Day 10 is the return to Cape Town, roughly two hours from Swellendam along the N2. If ten days of largely self-driven touring has you ready to hand the wheel over for the last stretch, a private, customisable tour is worth considering for this closing leg — it can be built around wherever you want to stop on the way back, rather than following a fixed route.
Before the drive, the Cape Agulhas day trip guide and the Cape Agulhas destination page are worth a look, and the Swellendam destination page together with Route 62 and Swellendam shows what the overnight can include. Since this itinerary leans on a hire car, driving in South Africa and car hire in Cape Town cover the practical side, from road habits to collecting the vehicle. Allow yourself a slow final morning in Swellendam; arriving back in the city with energy left makes the last evening far more enjoyable.
Day-by-day summary
| Days | Focus | Don’t miss |
|---|---|---|
| 1–2 | Table Mountain, city, Cape Point, Simon’s Town | Keep the mountain flexible; pack for peninsula wind |
| 3–4 | Stellenbosch, Franschhoek, Paarl | A driver or tour every day — never self-driving tastings |
| 5 | Robben Island | Book early; ask about rebooking if the sea cancels it |
| 6 | Langebaan, West Coast | A genuine change of scenery; self-drive is fine here |
| 7–8 | Hermanus, Gansbaai | Clifftop whales June–November; shark cage diving weather-dependent |
| 9–10 | Cape Agulhas, Swellendam, return | Africa’s true southernmost point; a long final drive home |
tours.10 days
Verified deep-linked GetYourGuide tours. Book through these links and we earn a small commission at no cost to you.
Photos show the destination, not the operator's own images.